The integrated development environment (IDE) in Visual Studio 2019 is very good at what it does. Developers use it to make a lot of different kinds of apps, such as web, mobile, PC, and cloud-based ones. Although setting up Visual Studio 2019 on your computer is a straightforward process, it is very important that you carefully follow all the steps to make sure everything goes smoothly. If you want to easily install Visual Studio 2019 (64-bit) on your Windows computer, this guide will show you how to do it step by step.
Prerequisites:
Before you begin the installation process, ensure that your system meets the following prerequisites:
Operating System:
Visual Studio 2019 requires a Windows operating system. It is compatible with Windows 10, Windows 8.1, Windows 8, and Windows 7 SP1.
System Requirements:
Your system should meet the minimum hardware requirements specified by Microsoft for running Visual Studio 2019. These requirements typically include a minimum processor speed, RAM, and available hard disk space.
Internet Connection:
A stable internet connection is recommended for downloading the Visual Studio installer and necessary components.
Installation Steps:
Download Visual Studio Installer:
- Open a web browser and navigate to the official Visual Studio website:
https://visualstudio.microsoft.com/.
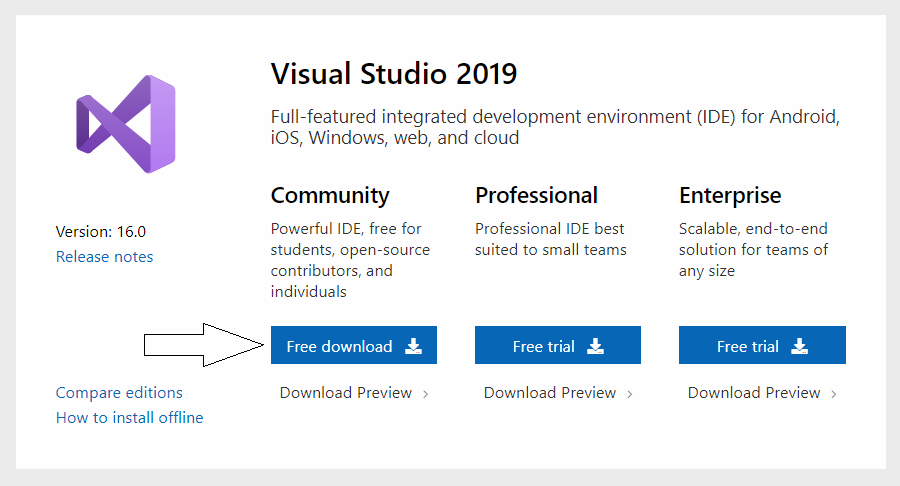
- Click on the “Download Visual Studio” button.
- Save the installer file to your local drive.
Run the Installer:
- Locate the downloaded installer file (usually named vs_[edition]_[version]_installer. exe) and double-click on it to run.
- If User Account Control asks you, select “Yes” to allow the installer to make changes to your system.
Select Workloads:
- The Visual Studio installer will launch and present you with various workload options. Workloads represent different sets of tools and components tailored for specific types of development.
- Choose the workloads that best suit your development needs. Common workloads include “.NET desktop development,” “ASP.NET and web development,” “Mobile development with .NET,” etc.
- You can also customize the installation by selecting or deselecting individual components under each workload.
Choose Individual Components (Optional):
- If you opt for a custom installation, you’ll be presented with a list of individual components.
- Review the components and select or deselect them based on your requirements.
- Ensure that the “64-bit Compiler” option is selected if you need 64-bit development support.
Modify Installation Location (Optional):
- Visual Studio will be set up in the “Programme Files” folder on your system drive by default. To put it somewhere else, click on the “Installation location” link and type in a different path.
Start Installation:
- Once you’ve made your selections, click on the “Install” button to begin the installation process.
- In the installation, download and install the selected components. This process may take some time, depending on your internet connection speed and the selected components.
Complete Installation:
- After the installation is complete, you may be prompted to restart your system to apply the changes.
- Once your system restarts, launch Visual Studio 2019 from the Start menu or desktop shortcut.
Sign-In or Skip Sign-In (Optional):
- You will be asked to sign in with your Microsoft account the first time you open Visual Studio. When you sign in, you can get extra features like cloud services, setting synchronization, and managing your licenses.
- If you prefer not to sign in at this time, you can choose to skip the sign-in process. You can always sign in later from within Visual Studio.
Configure Initial Settings:
- Follow the on-screen prompts to configure your initial settings, such as theme selection, development environment layout, and default settings.
Ready to Use:
- Once the initial configuration is complete, Visual Studio 2019 is ready to use. You can start creating new projects, opening existing ones, and exploring the features of the IDE.
Final Thoughts:
For developers who want to make strong apps that work on many platforms, this guide shows them how to install Visual Studio 2019 (64-bit). It makes sure that the setup goes smoothly. Visual Studio has features and tools for making web apps, PC apps, and mobile apps. As you code, look into its features, add-ons, and connections to make your work easier and more productive. Use online tools, tutorials, and communities to stay up to date on the latest developments in software development. Have fun writing code with Visual Studio 2019, and may your projects be creative, beautiful, and fun.

